
In the hustle and bustle of modern life, finding time to prepare wholesome, satisfying meals can feel like a juggling act. enter the magic of make-ahead casseroles-the culinary superheroes that let you “set it and forget it,” transforming your fridge or freezer into a treasure trove of ready-to-bake delights. Whether you’re a busy professional,a parent juggling schedules,or simply someone who loves the comfort of a hearty,home-cooked meal without the last-minute stress,this ultimate guide will unlock the secrets to mastering casseroles that save time,amplify flavour,and bring convenience to your kitchen. Get ready to discover foolproof recipes, expert tips, and storage hacks that turn meal prep into a joyous, stress-free ritual!
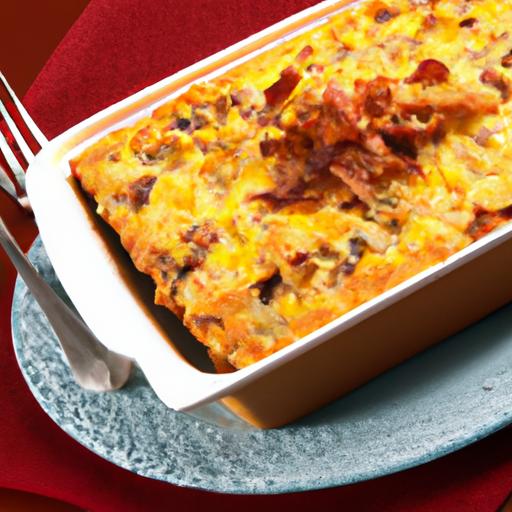
Set It and Forget It: The Ultimate Make-ahead casserole Guide
Set It and Forget it casseroles transform the way we approach weeknight dinners-effortless, flavor-packed, and perfectly primed for busy schedules. From the first time I layered fragrant herbs with creamy cheeses and roasted vegetables, I discovered the magic that happens when quality ingredients are thoughtfully chosen to maximize both flavor and longevity. This guide will inspire you to master ingredient selection, prep techniques, and storage strategies that ensure every bite tastes fresh, even days later.
Prep and Cook Time
- Preparation: 25 minutes
- Cooking: 45 minutes
- Total Time: 1 hour 10 minutes
Yield
Serves 6 generously
Difficulty Level
Easy to Medium - perfect for both beginners and seasoned cooks
Ingredients
- 2 cups cooked quinoa or brown rice, cooled
- 1 lb (450g) boneless, skinless chicken thighs, cut into bite-sized pieces
- 1 medium yellow onion, finely diced
- 3 cloves garlic, minced
- 1 cup sliced mushrooms
- 1 large red bell pepper, diced
- 2 cups fresh spinach, roughly chopped
- 1 cup shredded mozzarella cheese
- 1 cup cottage cheese or ricotta
- 1 cup low-sodium chicken broth
- 2 tablespoons olive oil
- 1 teaspoon smoked paprika
- 1 teaspoon dried oregano
- Salt and freshly ground black pepper, to taste
- Fresh parsley, for garnish
Instructions
- Preheat your oven to 375°F (190°C). Lightly grease a 9×13-inch baking dish with olive oil.
- Sauté onion and garlic: In a large skillet, heat olive oil over medium heat.Add diced onion and cook until translucent, about 4 minutes. Add minced garlic and sauté for another 1 minute until fragrant.
- Cook chicken: Add chicken pieces to the skillet. Sprinkle with smoked paprika, oregano, salt, and pepper. Sauté until chicken is browned and cooked through, about 7-8 minutes, stirring occasionally.
- Add vegetables: Stir in sliced mushrooms and diced red bell pepper. Cook until vegetables soften, about 5 minutes. Remove from heat, then fold in chopped spinach until slightly wilted.
- Combine filling: In a large bowl, mix cooked quinoa (or brown rice), sautéed chicken and veggies, chicken broth, cottage/ricotta cheese, and half of the shredded mozzarella. Adjust seasoning with salt and pepper if needed.
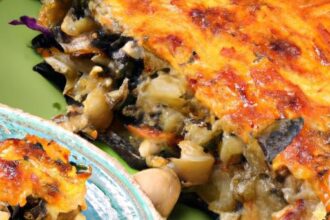
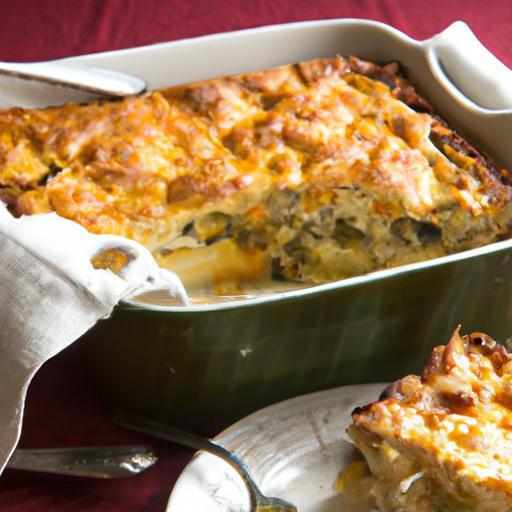
- Transfer & top: Spread the filling evenly into the prepared baking dish. Sprinkle the remaining mozzarella cheese on top for a bubbly, golden finish.
- bake: Place in the oven and bake uncovered for 35-40 minutes, or until the casserole is hot throughout and the cheese is beautifully browned on top.
- Rest before serving: let the casserole sit for 5 minutes before slicing. This helps it set for effortless portioning and serving.
Tips for Success: Mastering the Prep Process for Effortless Assembly and Storage
- Opt for fresh, firm vegetables-like crisp bell peppers and fresh spinach-to retain their texture and punch of flavor even after freezing and reheating.
- Fully cook proteins during prep; this prevents undercooked bits after freezing and reheating. Chicken thighs stay juicy and forgiving compared to breast meat.
- Use burrito-style layering: Mix core ingredients first for even distribution, then top with cheese to lock in moisture.
- Cool all cooked components to room temperature before assembling. This avoids excess condensation that causes sogginess during storage.
- for freezer-amiable prep, divide into individual portions before freezing-great for on-the-go meals or single servings.
- Label your containers with the bake date and reheating instructions for easy access and food safety.
Top Tips for Freezing and Reheating Without Sacrificing Taste
- Freeze promptly: After assembling, cover casserole with heavy-duty foil or airtight lids to prevent freezer burn.
- Thaw overnight: Transfer from freezer to fridge 24 hours before baking-this reduces cook time and guarantees even heating.
- Reheat low and slow: If reheating cooked leftovers, cover with foil and warm at 325°F (160°C) for 20-25 minutes to preserve moisture without drying out.
- Skim off any excess liquid after thawing if necessary to maintain a perfect texture.
Creative make-Ahead casserole Recipes That Impress Every Time
Explore variations of this easy base recipe by swapping in hearty lentils for a vegetarian version or adding roasted butternut squash for a cozy fall twist.Incorporate bold spices like cumin and coriander for a southwestern flair, or fresh basil and sun-dried tomatoes for vibrant Mediterranean vibes. With the right foundation, your Set It and Forget It casseroles become a platform for unlimited creativity-always deliciously extraordinary and ready when you are.
Serving Suggestions
Serve your casserole warm, garnished generously with freshly chopped parsley or a sprinkle of chili flakes for a subtle kick. Pair with a crisp green salad dressed in lemon vinaigrette or roasted garlic mashed potatoes for an extra comforting meal. A drizzle of balsamic glaze or a dollop of Greek yogurt can add luminous, creamy contrast that elevates every bite.

| Nutrient | Per Serving |
|---|---|
| Calories | 380 kcal |
| Protein | 32 g |
| Carbohydrates | 28 g |
| Fat | 14 g |
Ready to explore more comforting dishes? Check out our One-Pot Meals for every Night for more fuss-free inspiration. For additional tips on ingredient storage and preparation, visit the US Food Safety and Inspection Service.
Q&A
Q&A: Set It and Forget It-The Ultimate Make-Ahead Casserole Guide
Q1: What makes a casserole ideal for make-ahead cooking?
A1: The best make-ahead casseroles are those that maintain their flavor and texture even after refrigeration or freezing. Ingredients that hold up well include hardy vegetables, cooked grains, beans, and tender proteins like chicken or turkey. A sturdy sauce or binder helps keep everything cozy,ensuring the dish tastes fresh and tasty when you’re ready to bake.
Q2: can I assemble a casserole wholly ahead of time without losing quality?
A2: Absolutely! Many casseroles actually benefit from sitting overnight, allowing flavors to meld beautifully. Just be sure to tightly cover your dish with foil or plastic wrap to avoid drying out. When frozen, it’s best to thaw in the refrigerator overnight before baking to ensure even cooking.
Q3: What are some tips to prevent a make-ahead casserole from becoming soggy?
A3: To keep your casserole from turning gummy or watery, consider these tricks:
- Slightly undercook vegetables to prevent excess moisture release.
- Use thicker sauces or incorporate breadcrumbs or cheese on top to absorb moisture.
- Drain excess liquid from canned ingredients like beans or tomatoes before adding.
- For pasta or rice casseroles, cook but don’t overcook so they retain some bite after baking.
Q4: How far in advance can I prepare a casserole without compromising taste?
A4: Most casseroles can be safely assembled 1-3 days ahead when refrigerated, and they often develop enhanced flavors over that time. if freezing, store for up to 2-3 months for best quality. Label your casserole with the date to keep track!
Q5: What are some crowd-pleasing casserole fillings to try for make-ahead meals?
A5: Classic combos that work wonderfully ahead of time include creamy chicken with broccoli and rice, layered Mexican-style beans and corn with cheese, or a hearty vegetable lasagna featuring spinach, mushrooms, and ricotta. These combos offer comfort and convenience, perfect for any occasion.
Q6: can make-ahead casseroles be frozen directly after assembly?
A6: Yes! Freezing casseroles right after assembly locks in freshness. Use freezer-safe containers and seal tightly to prevent freezer burn. When ready to bake, thaw overnight in the fridge and then bake as usual, adding extra time if needed to ensure thorough heating.
Q7: Is it possible to make casseroles gluten-free or vegan for make-ahead purposes?
A7: Definitely! Swap customary breadcrumbs for gluten-free alternatives,use plant-based cheeses or creamy sauces made from nuts and vegetables,and layer in legumes and grains that pack flavor and nutrition. With a little creativity, make-ahead casseroles can suit every diet beautifully.
Q8: What equipment or containers work best for storing make-ahead casseroles?
A8: Glass or ceramic bakeware with lids are excellent for refrigeration and oven use, offering even heat distribution. For freezing, consider sturdy, airtight plastic containers or disposable foil pans covered well with foil and plastic wrap for double protection.Q9: How can I reheat leftovers from a make-ahead casserole without drying them out?
A9: Reheat gently in a preheated oven at 325°F (160°C), covered with foil to retain moisture. For single servings, microwave on medium power, adding a splash of broth or water if needed to keep the dish moist and tender.
Q10: What’s the biggest advantage of embracing the “set it and forget it” casserole strategy?
A10: The ultimate perk is reclaiming your time and reducing mealtime stress. With little upfront effort,you create nourishing,comforting meals that are ready when you are-a lifesaver for busy weekdays,hosting guests,or simply savoring homemade goodness on demand.
Final thoughts
With these make-ahead casserole strategies in your culinary toolkit, dinner dilemmas become a thing of the past. Whether you’re feeding a bustling family or prepping for a quiet weeknight,these recipes let you set it,forget it,and come back to a comforting,homemade meal-no last-minute fuss required. So go ahead, embrace the art of advance cooking, and transform mealtime into effortless moments of joy. Because sometimes, the best flavors are the ones that have been patiently waiting to be savored.